
Tutorial – The Cheapest Way To Make Your Website
Host and deploy a fully functioning website today from just $4.50/month using Amazon Web Services. Includes domain name registration, SSL certificate, and more.
Amazon Web Services (AWS) is the worlds most widely adopted Cloud Services provider. Some key benefits to hosting on AWS are:
- Cost effective: only pay for the resources that you use.
- Scalable: automatically add or remove resources based on traffic.
- Secure: built with high security at every level, from software to infrastructure.
Major companies hosting their services on AWS include: Netflix, Spotify, Twitch, Twitter, and many more.
Step 1 – Sign up for Amazon Web Services
You will be hosting your website using AWS, which means that you will need an AWS account. Sign up here and follow the prompts. Making an account is easy, but here is a guide in case you get stuck.
NOTE: This will require a credit card.
Step 2 – Register a domain name with Amazon Route 53
To make your website accessible to the internet, you must first register a domain name. There are many domain name providers to choose from, including big names such as Bluehost and GoDaddy. There is also a lesser known domain name provider called Route 53, which is one of many offerings from the AWS cloud.
Below is a price comparison of common domain name providers when registering a .com domain. As you can see, Route 53 is far cheaper than the well known providers.
| Domain registrar | Registration cost (one time fee) | Renewal cost (yearly) |
| Domain.com | $8.99 | $59.88 |
| Bluehost | $12.99 | $17.99 |
| GoDaddy | Free | $28.23 |
| Amazon Route 53 | Free | $12.00 |
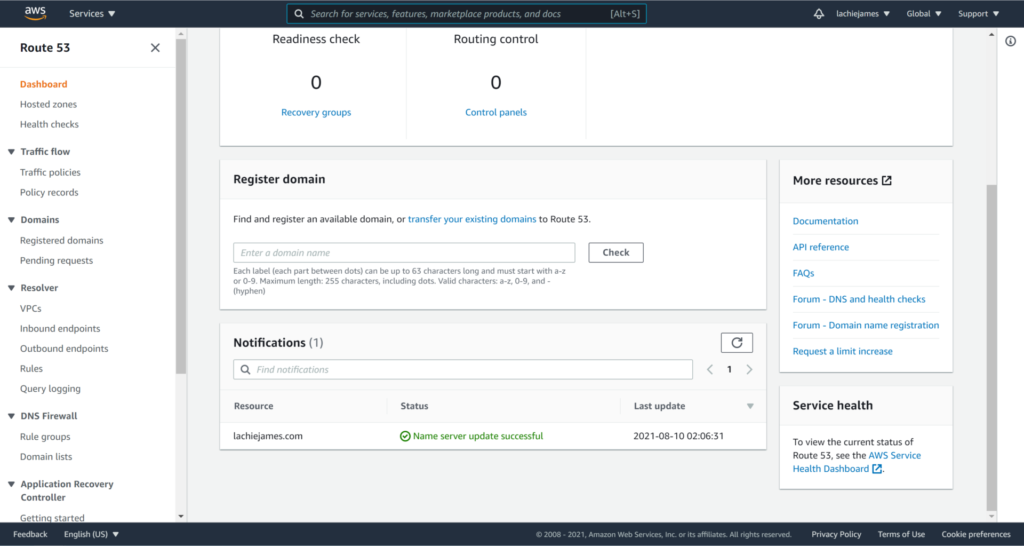
Start by logging into the AWS management console and entering Route 53 into the search bar. Click on the first result to go to the Route 53 console.

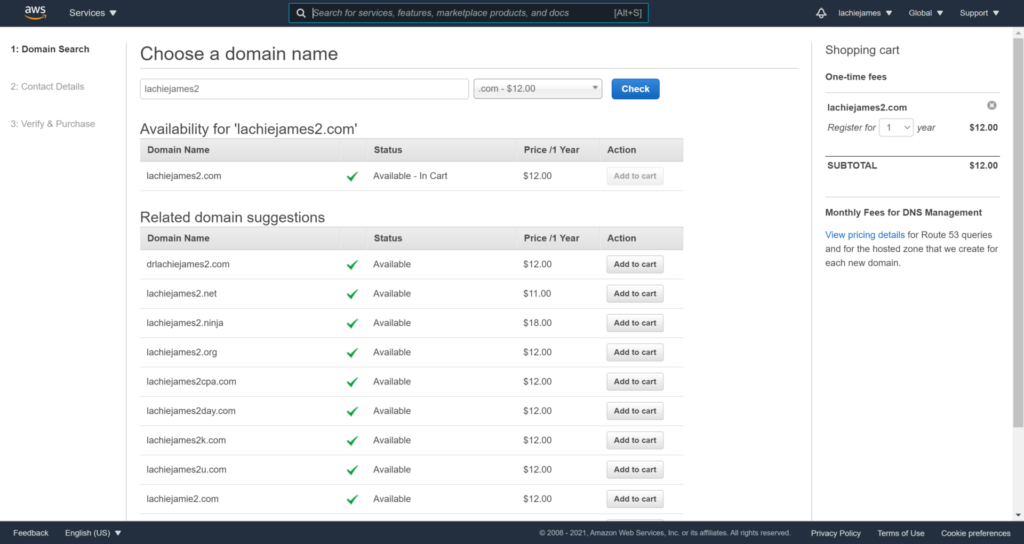
Scroll down to the Register domain section and enter your desired domain name. Click Check to determine the availability and pricing of your domain.
If the domain name is available then you will be taken straight to the checkout. On the sidebar, choose the number of years that you would like to register the domain for. If you are satisfied with the price, click Continue.
You will be asked to enter some personal details as part of your registration. As a bonus, Route 53 will hide your personal information from the public WHOIS database for free, a service that Bluehost charges $16.17/year for.
Once you complete your order, you will be taken to this screen
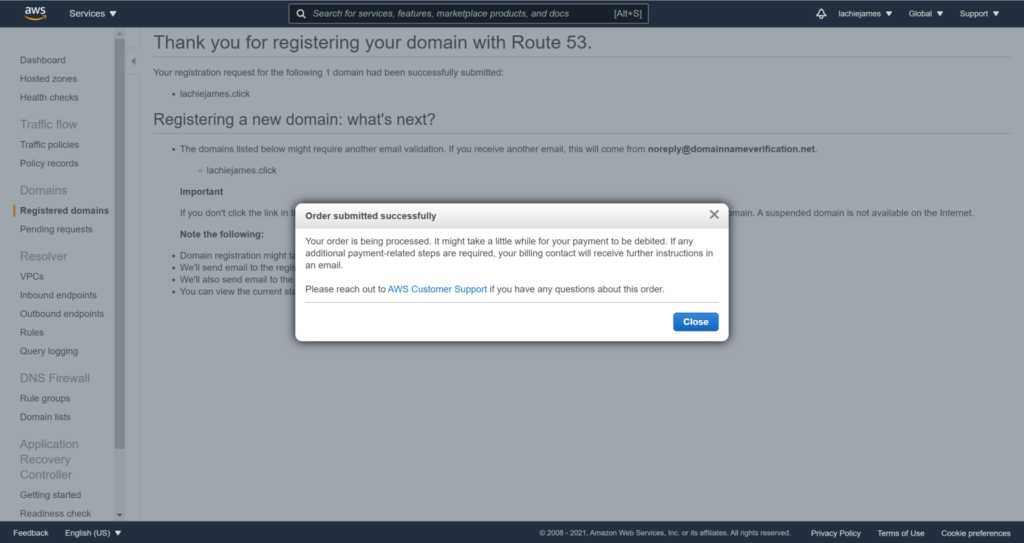
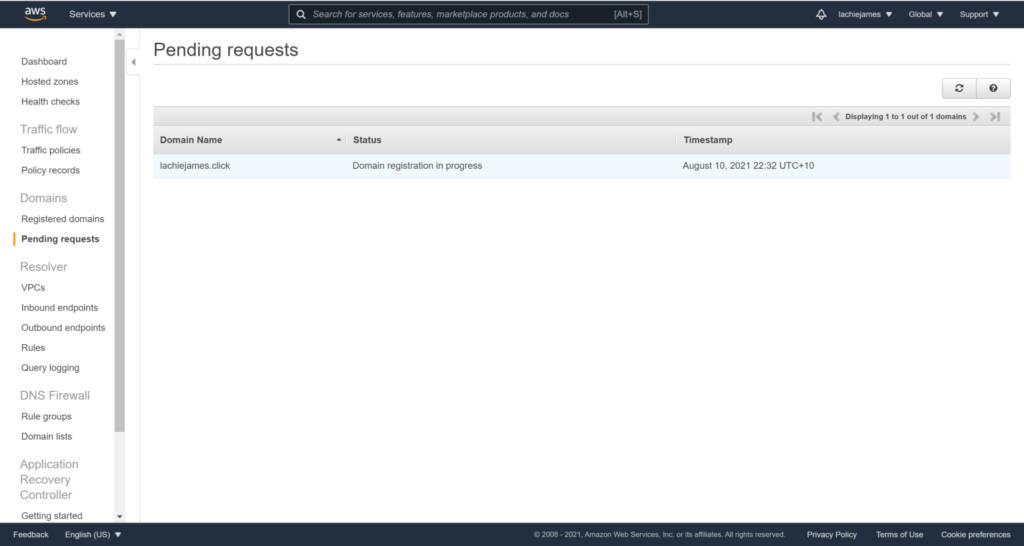
In the sidebar, navigate to Pending requests to view the registration status of your domain name. AWS will send you an email once the registration is complete, which usually takes up to 2 hours.
Congratulations, you now have a domain name. But it doesn’t do anything right now since it is not attached to a server. Next let’s set up web hosting with Amazon Lightsail.
Step 3 – Host your website with Amazon Lightsail
Amazon Lightsail is a Virtual Private Server (VPS) that makes it easy to deploy and configure your own website. It is beginner-friendly and allows you to perform complex tasks with just a few clicks. Lightsail is also very affordable, with plans starting from just $3.50/month.
Here is a price comparison of common web hosting services:
| Domain registrar | Minimum hosting cost (monthly) |
| GoDaddy | $11.95 |
| Bluehost | $9.99 |
| WordPress.com | $5.00 |
| Amazon Route 53 | $3.50 |
Back in the the AWS console, navigate to Amazon Lightsail by using the search bar at the top of the page.
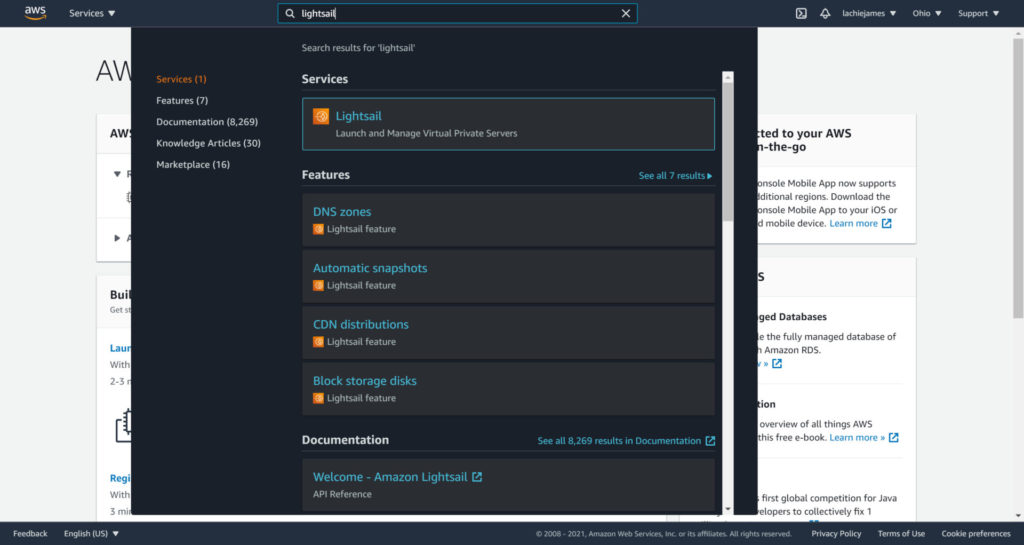
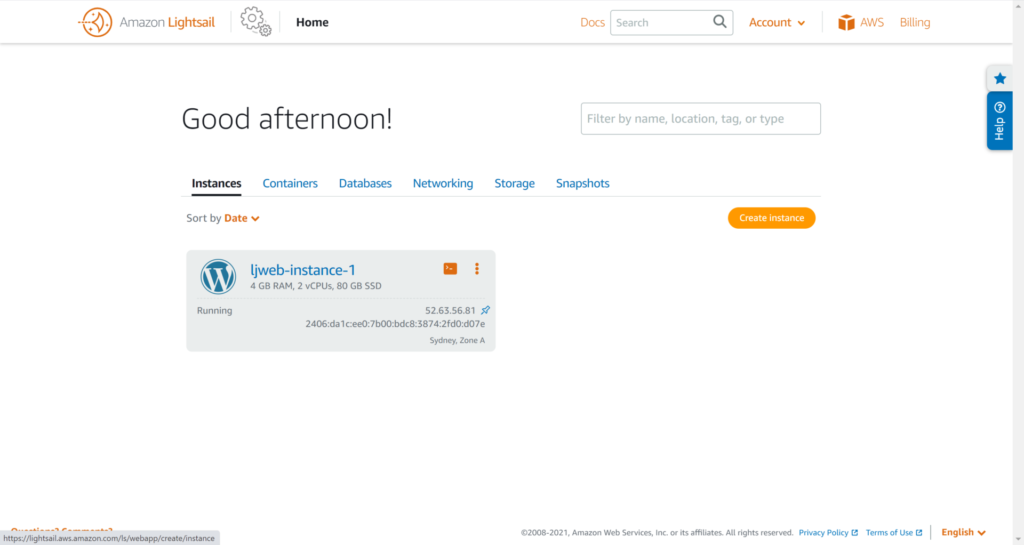
This will take you to the Amazon Lightsail instance dashboard, which will be empty if you have never used Lightsail before. Let’s fix that by clicking the orange Create Instance button.
Now you must specify some important information about your instance. In Lightsail, an instance is like a computer that lives in the AWS cloud. This computer is reserved for you, and is what will be running your website.
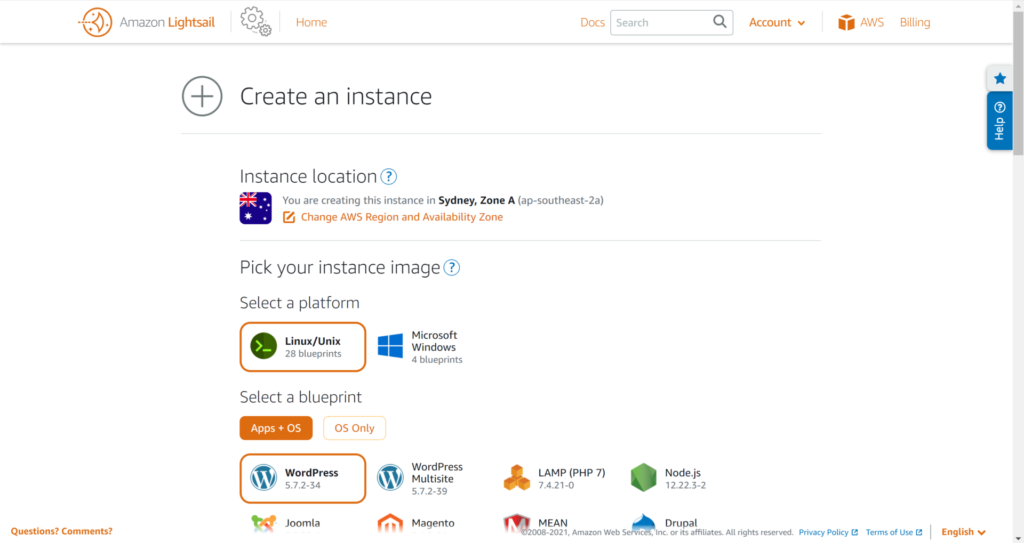
From here, we need to specify the following options:
- Instance location: The geographical location that your instance will be located. For best results, choose a region that is close to the majority of your eventual end-users.
- Select a platform: Linux/Unix
- Select a blueprint: Choose the technology that you will use to build your website. For the rest of this tutorial, I will be using WordPress.
- (Optional) Enable automatic snapshots: Have Lightsail take a full backup of your instance every 24 hours at the time of your choosing.
- Choose your instance plan: Consider choosing a small and cheap instance while in the early stages of creating your website. You can switch to a more powerful instance once you go live.
- Identify your instance: All resources in AWS need to have a name. This can be anything that you want, but you should choose something descriptive.
- Click
create instance
This will take you back to the instance dashboard, from which you will see your new machine being deployed. This should only take a few minutes.
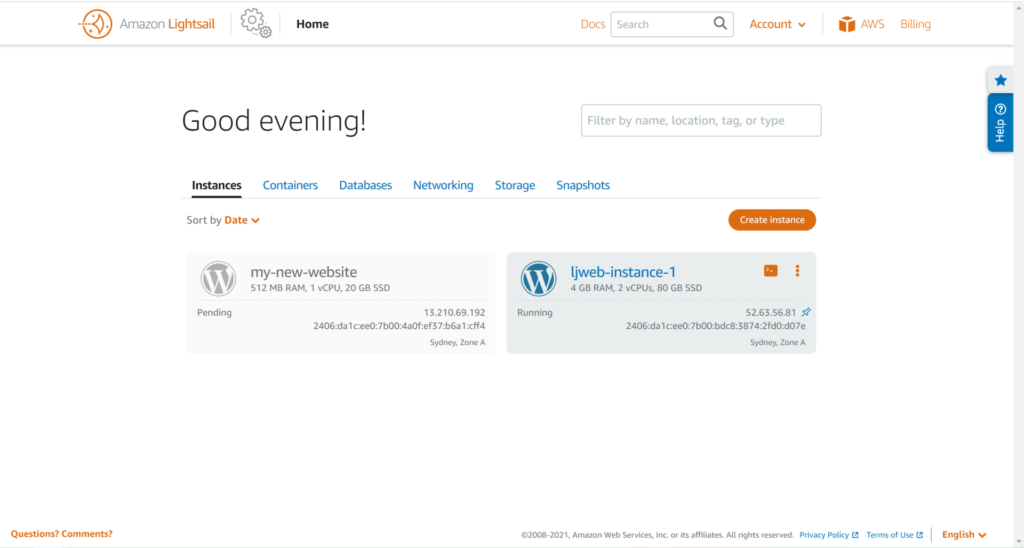
Once your instance status changes from pending to running, click on the instance name to start configuring it.
You should see that an IP address has been assigned to your instance. Copy the IP address and paste it into your browser to visit your website for the first time.
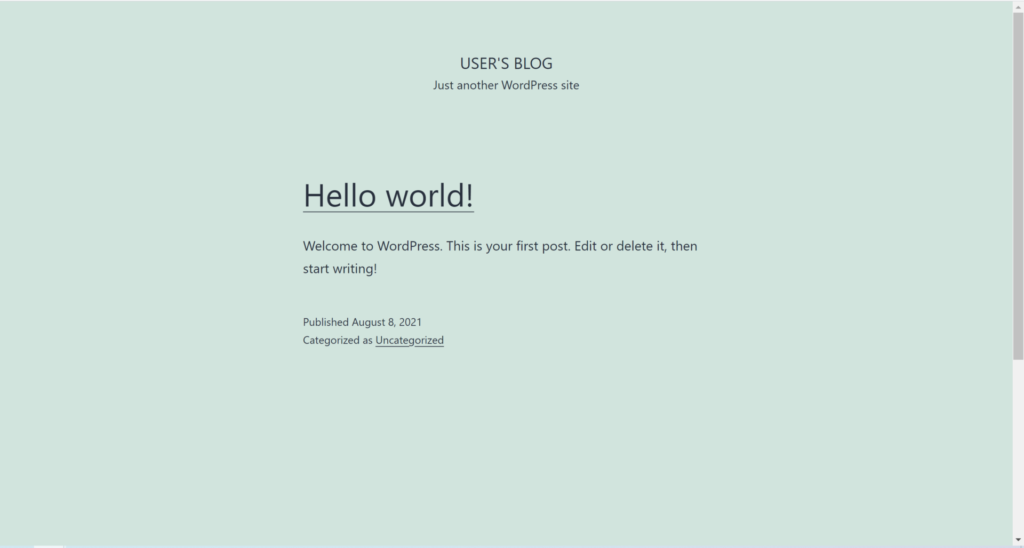
Your website is very ugly right now, and does not have a domain name associated with it. But don’t fret, we will fix that soon.
Step 4 – Assign a static IP address
Right now your website can be viewed at the IP address that you were assigned. There is one problem though: if your instance ever goes offline for some reason, this IP address will change!
You can prevent this issue by attaching a static IP to your instance. A static IP address will be reserved for your Lightsail account, meaning that no one else will be able to steal it. It can also be attached to other Lightsail instances, which will be useful if you decide to scale up your instance later.
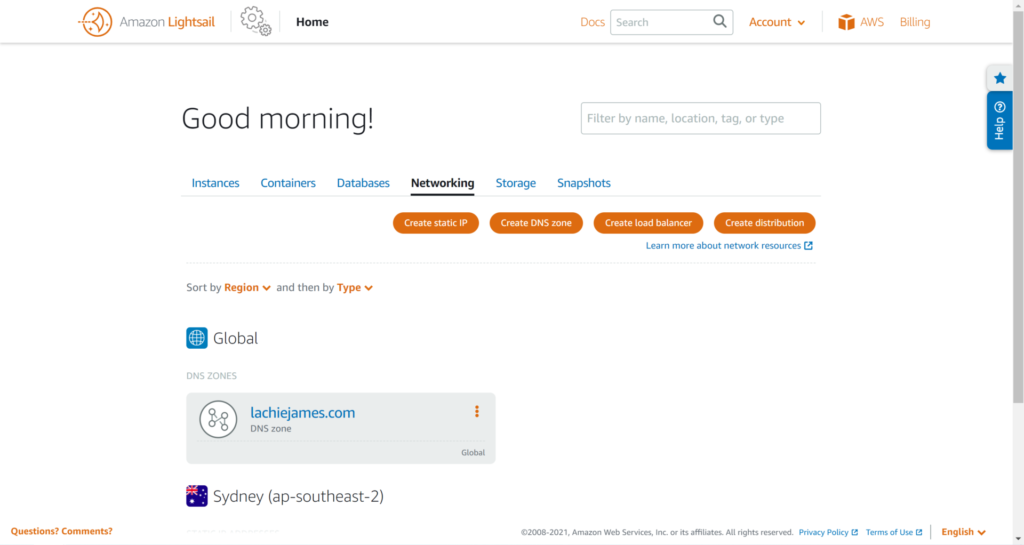
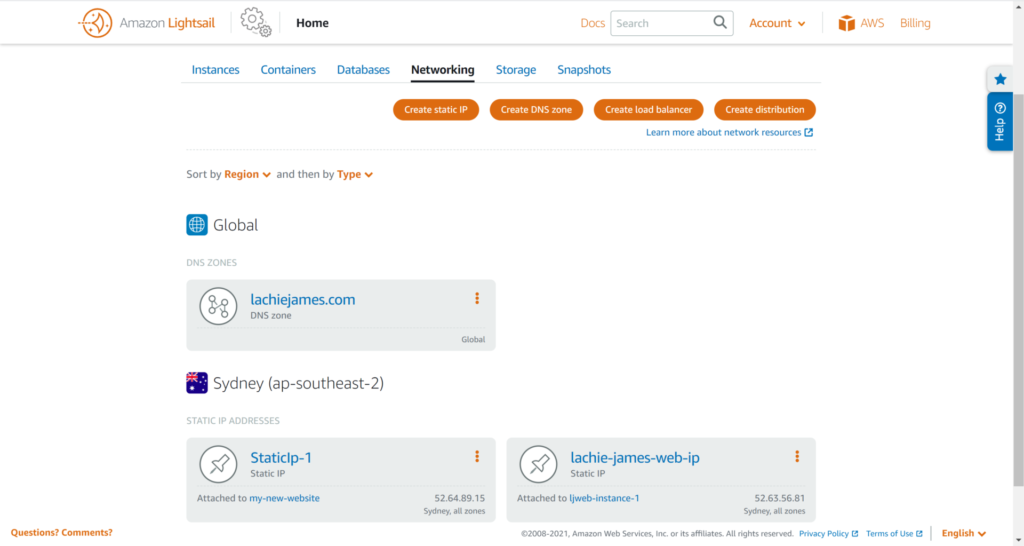
Go back to the Lightsail instance dashboard, and navigate to the Networking tab.
NOTE: The instance configuration page also has a Networking tab which serves a different purpose.
Click the orange Create static IP button.
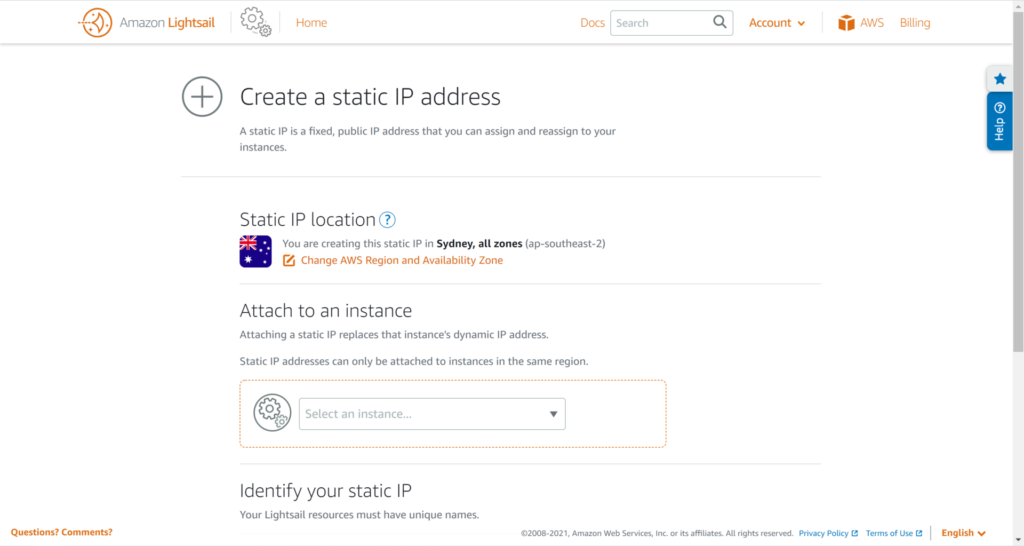
Use the following configurations:
- Static IP location: The same location that you used for your instance.
- Attach to an instance: Expand the drop down menu and select your instance.
- Identify your static IP: Because a static IP is an AWS resource, it needs to have a name.
Finally, click Create.
In your instance configuration you will notice that a new IP address has appeared. This is the static IP address of your website, and now the previous address has been discarded.

Step 5 – Assign a domain name
Navigate back to the Networking tab from the Lightsail home page. This time, click on Create DNS zone.
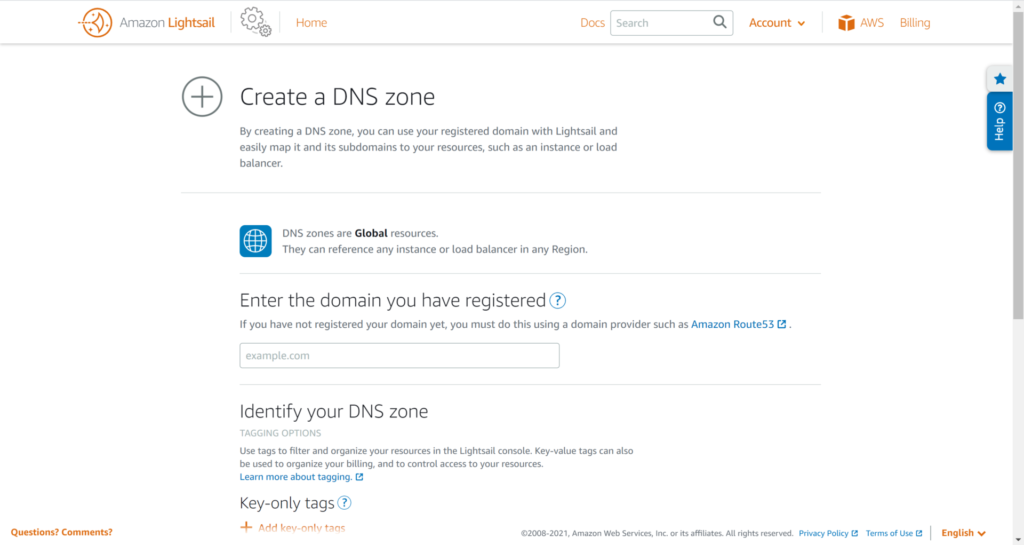
Enter your registered domain name and then click Create DNS zone.
This will take you to DNS zone management page, from which you will configure your instance to use your registered domain name.
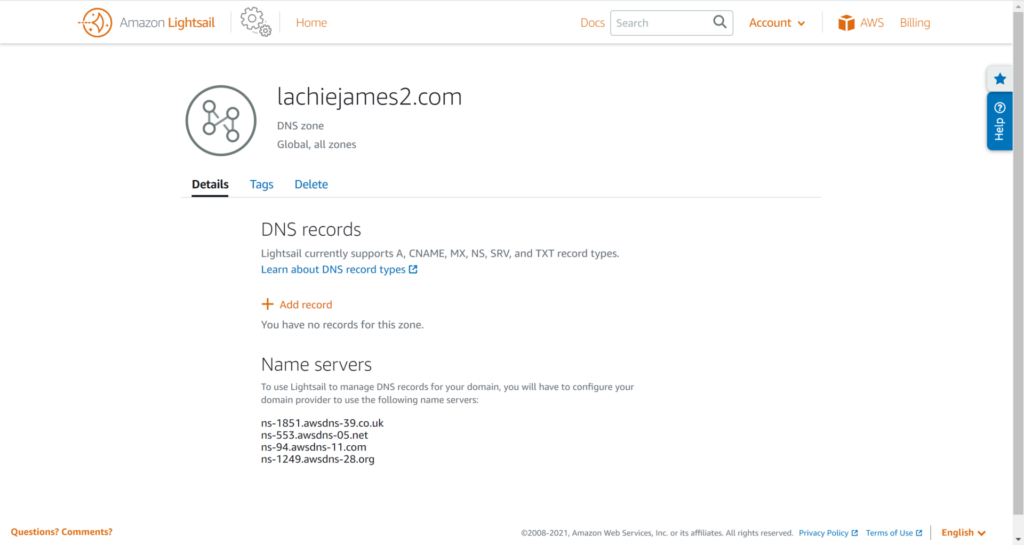
Click Add Record.
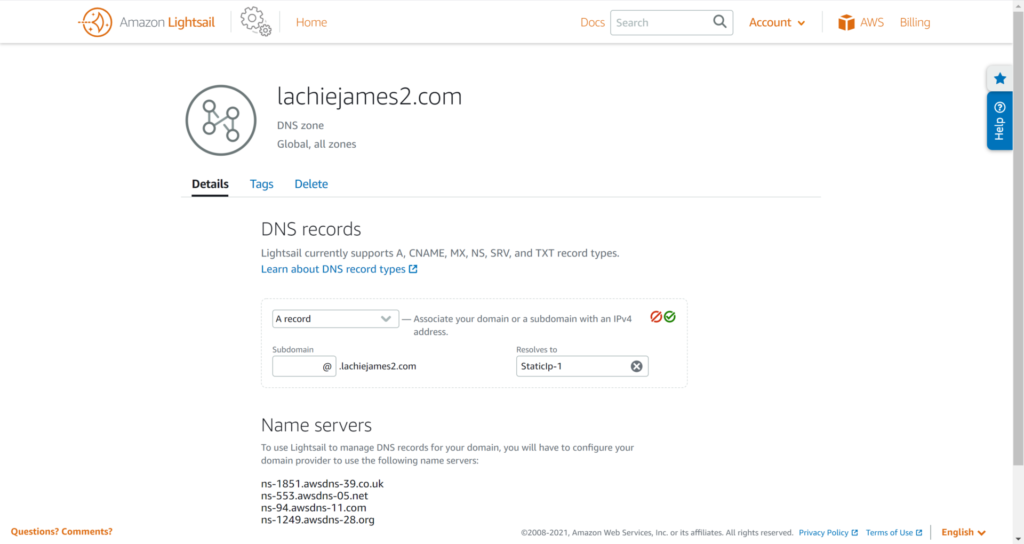
Keep the default record type of A Record. This means that the domain name will be pointing towards an IP address. Enter @ as your subdomain and then select your new static IP address.
Click the green tick to apply the changes.
Next we will need to tell Route 53 that Lightsail is our website host. Take note of the 4 web addresses under the Name Servers section.
Navigate to Route 53 and click on your registered domain name. Click on the NS record, which contains 4 different web addresses, and then click Edit Record.
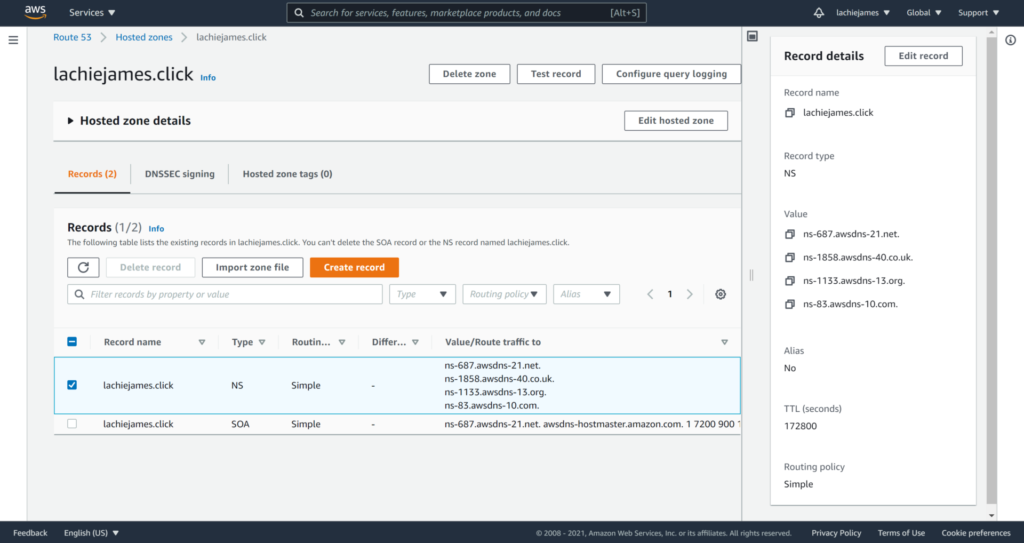
Delete the contents of the Value section and paste in the 4 web addresses from the Lightsail DNS management page. Save the changes to give Lightsail ownership of your domain’s DNS records.

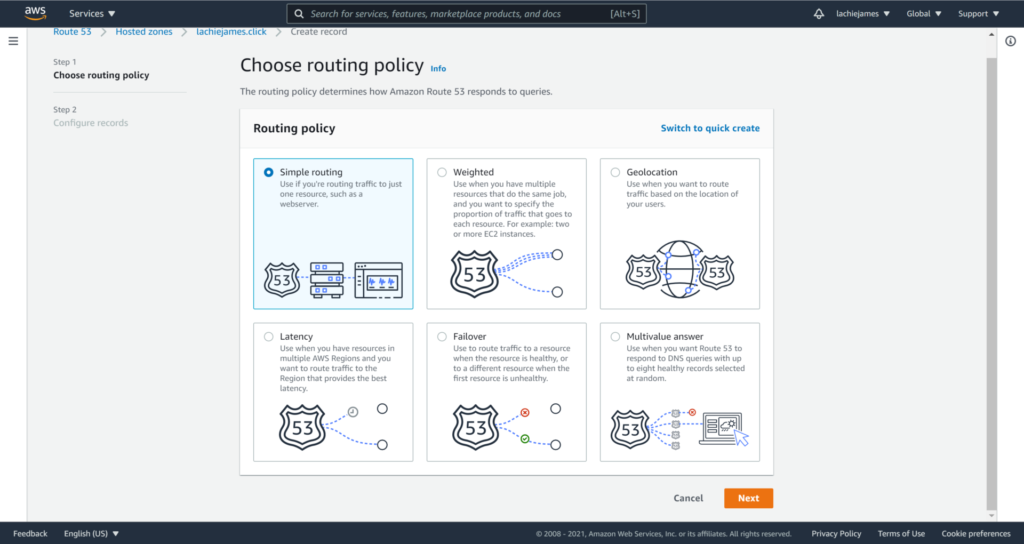
We also need to point our domain name to the Lightsail instance’s IP address. To do this, click Create record.
Choose Simple routing and click Next.
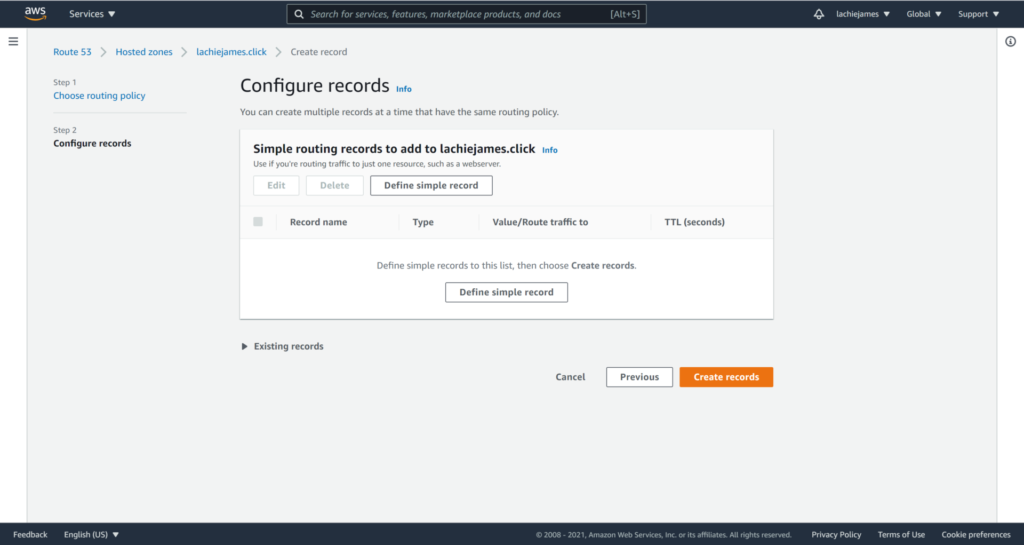
Now click Define simple record.
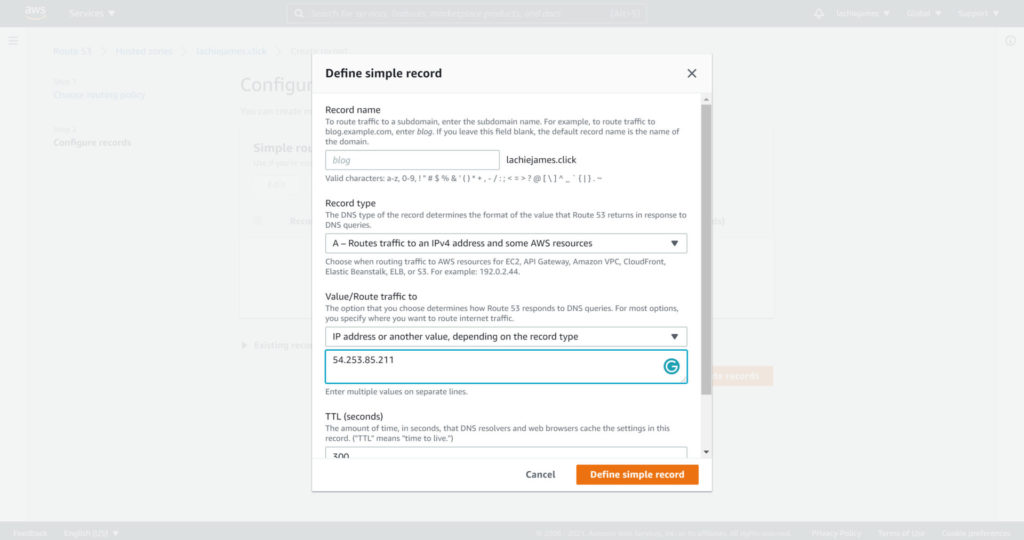
Use the following configurations:
- Record name: Leave this field blank.
- Record type: A – Routes traffic to an IPv4 address and some AWS resources
- Value/Route traffic to: IP address or another value, depending on the record type. Enter your static IP address in the new field below it.
Click Define simple record and then Create records to apply the changes.
Wait a few minutes for the changes to propagate through the DNS network. After that you should be able to access your website using your registered domain name.
Step 6 – Secure your website with SSL
When you navigate to your website, you may notice that a not secure warning appears next to the address bar. This is because we are not providing users with an encrypted connection to the website. For this, we need an SSL certificate.
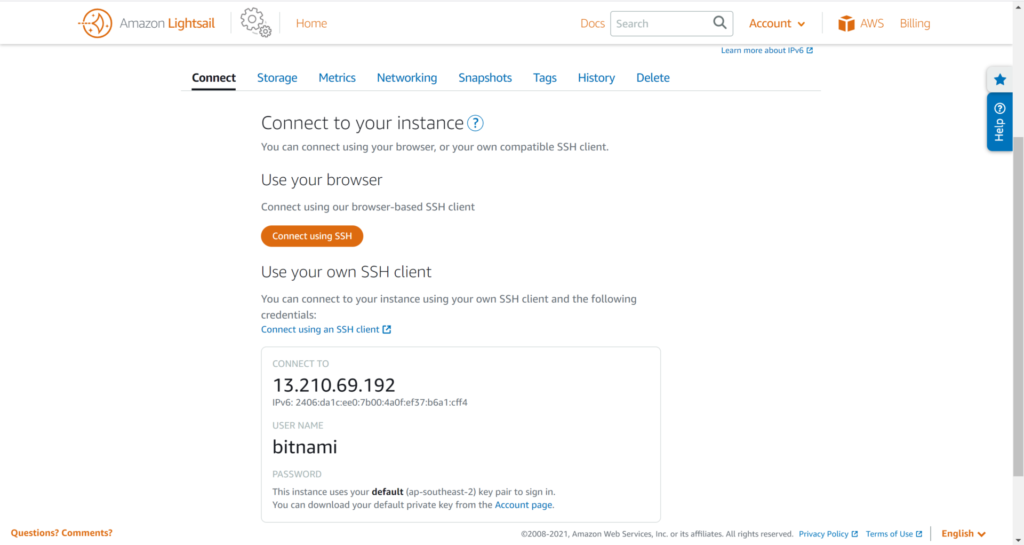
Start by navigating to the Lightsail instance configuration page. Connect to your instance by clicking the orange Connect using SSH button.

This will open up a Bash Terminal from which you can interact with the machine that is running your website. Run the HTTPS Configuration Tool to install your site’s SSL certificate by running the following command:
sudo /opt/bitnami/bncert-tool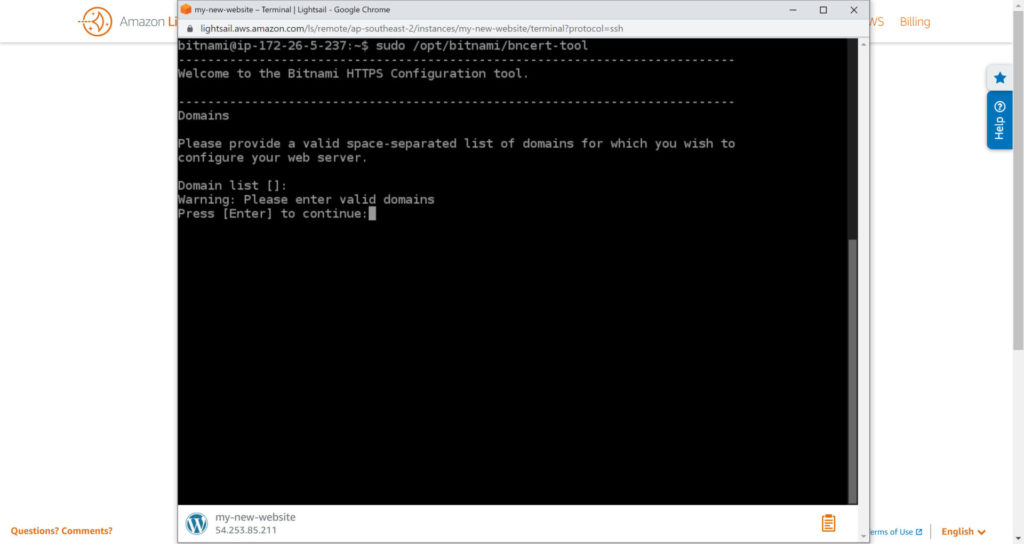
Respond to the prompts using the following values:
- Domain list: Enter your website’s domain name in the form of
example.com. - The following domains were not included ___. Do you want to add them:
n - Enable HTTP to HTTPS redirection:
y - Do you agree to these changes:
y - E-mail address: Enter your email address
- Do you agree to the Let’s Encrypt Subscriber Agreement?
y
If the HTTPS configuration tool ran successfully, the following message will be logged.
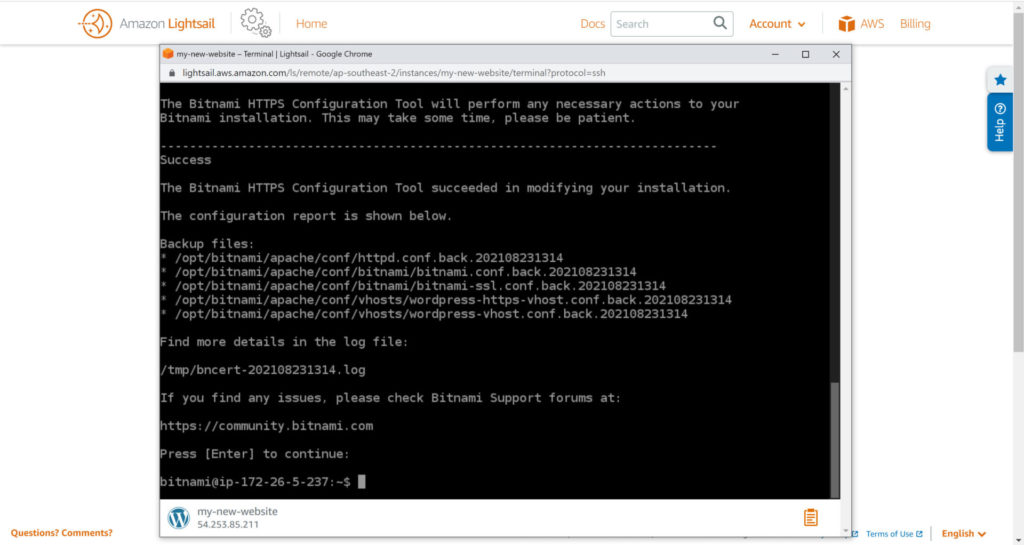
Navigate back to your website using your domain name in the form of example.com and you should be redirected to https://example.com/. The presence of https in your URL indicates that the connection to your website is encrypted, so the not secure warning will no longer appear for users visiting your website.
Step 7 – Get to the WordPress administration dashboard
To start customising your website, you must first get to the WordPress administration dashboard. To access the dashboard, you will need to find the password that was randomly generated when Lightsail created your instance.
Enter the following command in your instance terminal to reveal your WordPress password:
cat $HOME/bitnami_application_password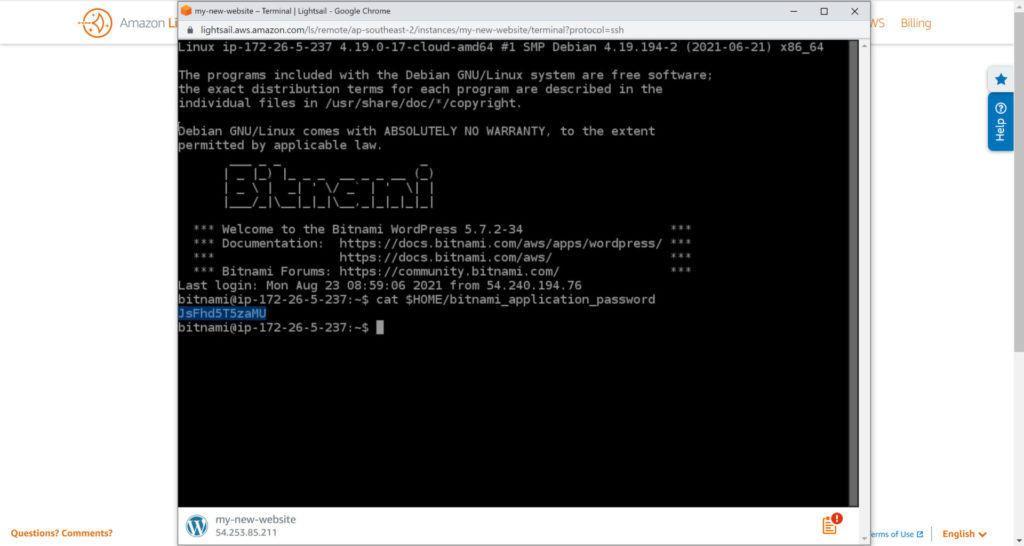
Copy the password and navigate to your WordPress dashboard. You should now be able to access it by appending /wp-admin to the end of your domain name. For example, if your domain name is example.com then you would access the WordPress dashboard at example.com/wp-admin.
You will then be prompted to log in. Enter user as the username and paste in your password.
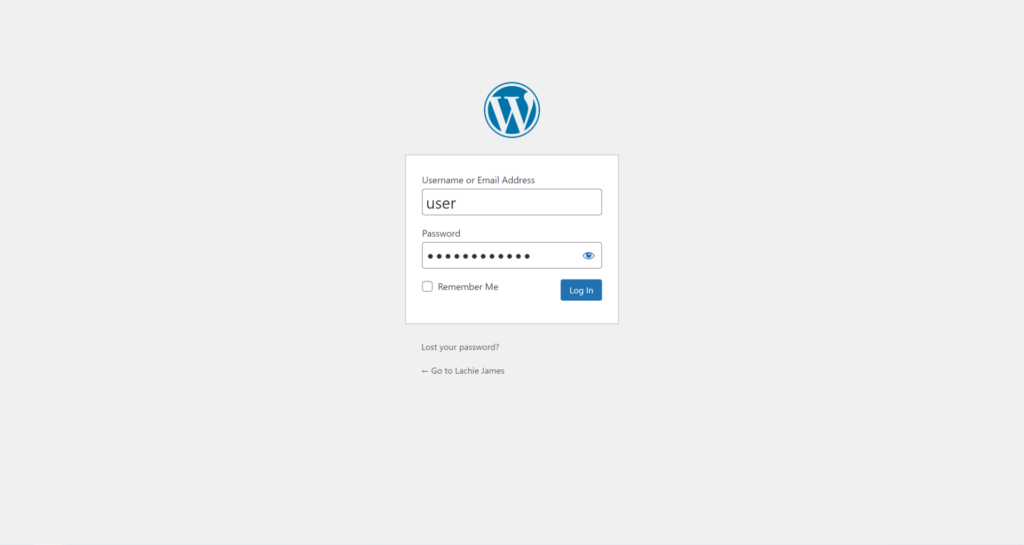
Congrats! You made it to the WordPress Dashboard.
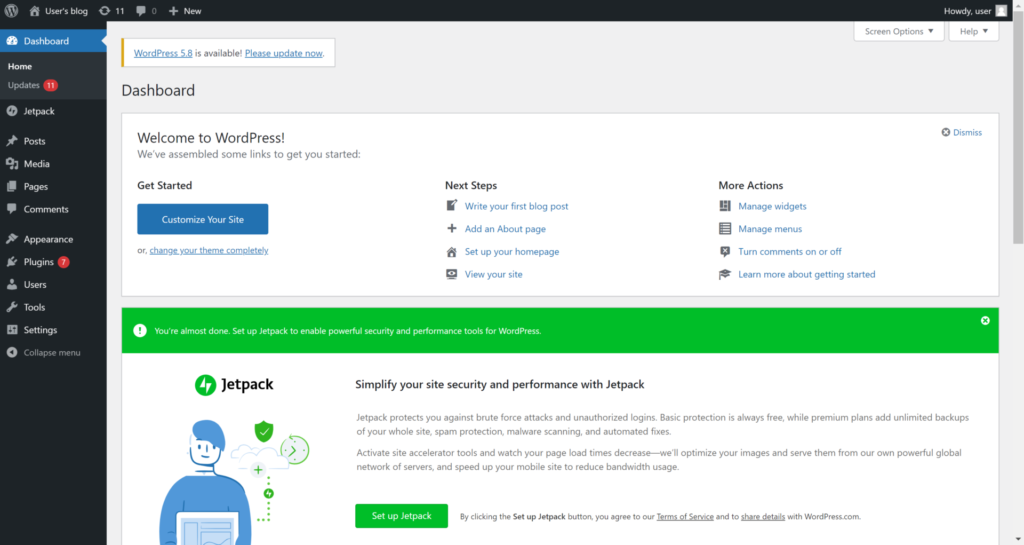
Now that you have a fully functional website, you can start customising it to suit your needs. Take the next step by checking out these resources:
- Choosing the right theme
- Sourcing high quality images for free
- Enhance security with these prebuilt Apache modules
- Add new features to your website using plugins