
Automate Your Release Workflow With semantic-release
Stop wasting time with manual release processes and let semantic-release do the work for you. Automate your publishing, release notes, and more.
What is semantic-release?
semantic-release is an npm package that automates common tasks in a release workflow. This includes:
- Determining which type of release should occur (minor, major, etc.)
- Updating your package version accordingly
- Generating and committing release notes
- Publishing the new version to your package registry
It achieves this by analysing your commit messages to determine what kind of changes are going to be released. By following the semantic versioning guidelines, it can determine whether to release a patch release, minor release, major release, or no release at all.
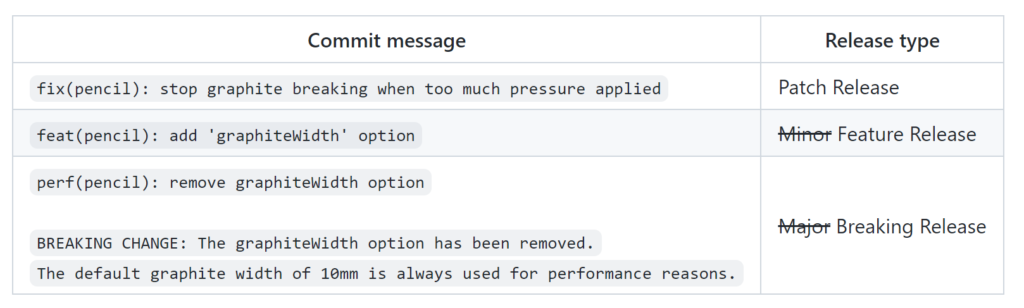
Here are some example commit messages, as well as the release type they would result in with semantic-release:
Benefits of using semantic-release
When releasing a package update, you will typically need to complete the following tasks:
- Commit the required changes
- Increment the version number of the package
- Add release notes so that others are aware of what changed
- Merge the changes into the main branch
- Publish the new package to the appropriate registry
If using semantic-release, this process becomes:
- Committing the required changes using semantic commit messages
- Merging the changes into the main branch
Given that releases are such a common occurrence in Software Development, countless hours can be saved by automating them.
Setup guide
Project Configurations
Get started by installing the required dependency:
npm install semantic-release --save-devAdd a .releaserc.js file to the root of your project, which will be the semantic-release configuration file. We must tell semantic-release which branches to publish releases from, which in this case is the main branch. If you are using master as your default branch, then replace ["main"] with ["master"].
module.exports = {
    branches: ["main"],
};
(Optional) Ensure semantic commit messages with commitlint
For semantic release to work, your commit messages must follow the semantic versioning guidelines. If you have not been using semantic commit messages up until now, then this is easy to forget.
To prevent this issue, you should also add a git-hook that validates your commit messages. By adding the commitlint npm package, git will immediately block any commit messages that are not in the required format.
Install the required dependencies:
npm install --save-dev @commitlint/config-conventional @commitlint/cli huskyAdd a file to the root of your directory called commitlint.config.js, then paste in the following contents:
module.exports = {
    extends: ["@commitlint/config-conventional"],
};
Activate git hooks with husky, which will create the .husky directory in your project.
npx husky install;Create a new file at .husky/commit-msg and paste in the following contents:
#!/bin/sh
. "$(dirname "$0")/_/husky.sh"

npx --no-install commitlint --edit $1
Generate a personal access token for Git
Part of the semantic-release process involves updating and committing a Changelog to your repository. This means that semantic-release must have push access to your repository, hence you will need to generate a Personal Access Token.
If your repository is hosted on GitHub then follow the steps below to generate this token. If your repository is hosted elsewhere then consider looking up a tutorial as the process may be slightly different.
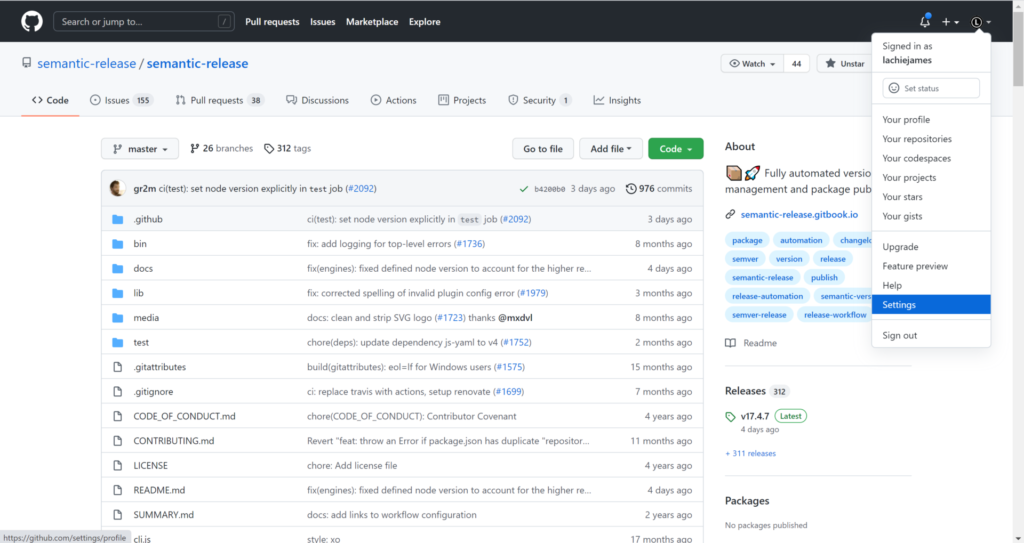
Go to GitHub, expand the menu on the top right and then click Settings.
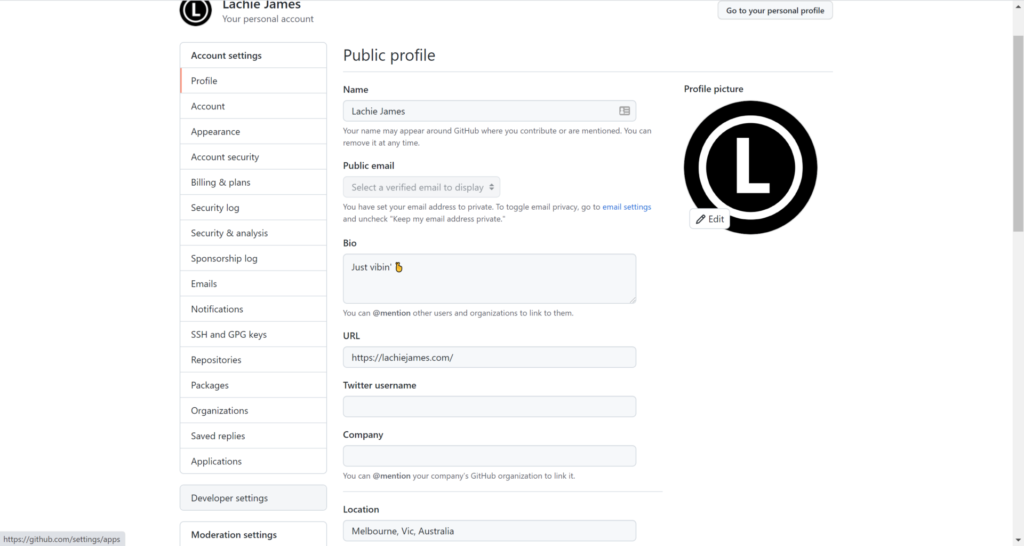
Scroll down to click on Developer Settings
Click Personal Access Tokens and then Generate new token. Give the token a name, expiration date, and appropriate permissions. Then scroll down and click Generate token.

Your new GitHub token key will display on the screen. Copy it now as you will not be able to retrieve it later.
Generate a personal access token for NPM
If your releases are hosted on npmJS then follow the steps below to generate this token. If your releases are hosted elsewhere then consider looking up a tutorial as the process may be slightly different.
Sign into npmJS and navigate to Access Tokens.
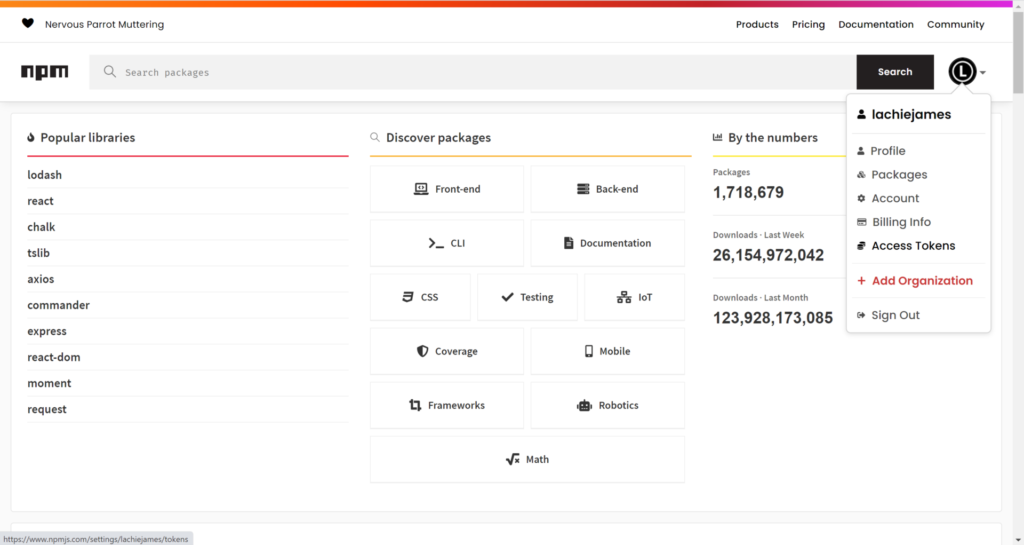
Click Generate new token
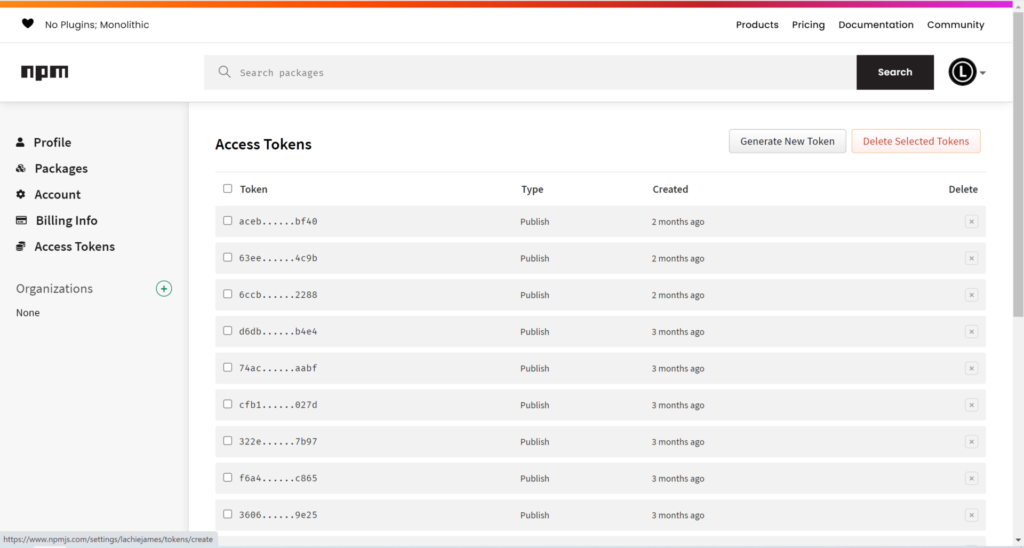
Ensure that you select the Publish permission type so that new package versions can be published to npmJS.
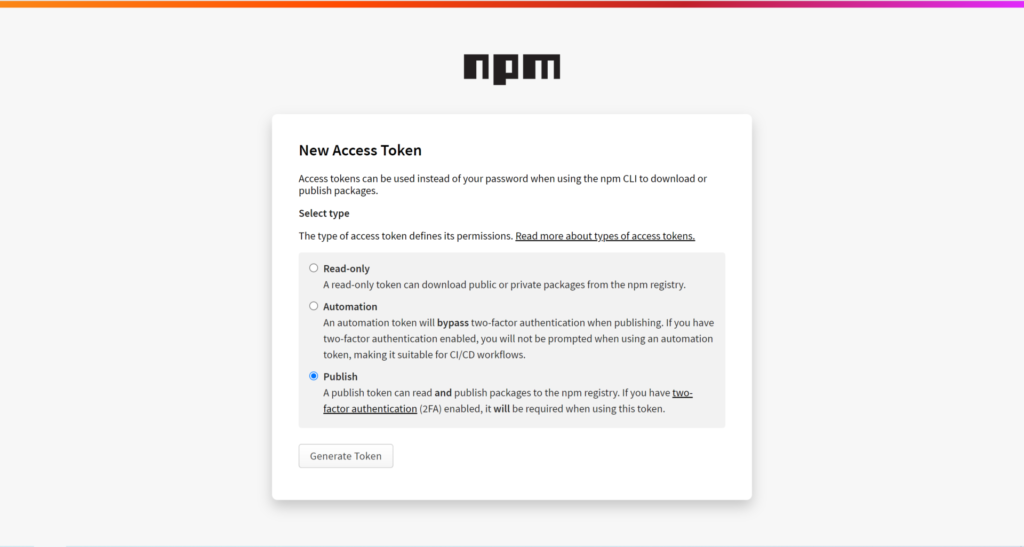
Your new npmJS token key will display on the screen. Copy it now as you will not be able to retrieve it later.
Setup your CI/CD environment
Go to your CI environment and add the access tokens as environment variables. The GitHub token must be named GH_TOKEN and the npm token must be named NPM_TOKEN.
Make sure to keep these variables secret to prevent an unauthorised user from making changes to your repository.
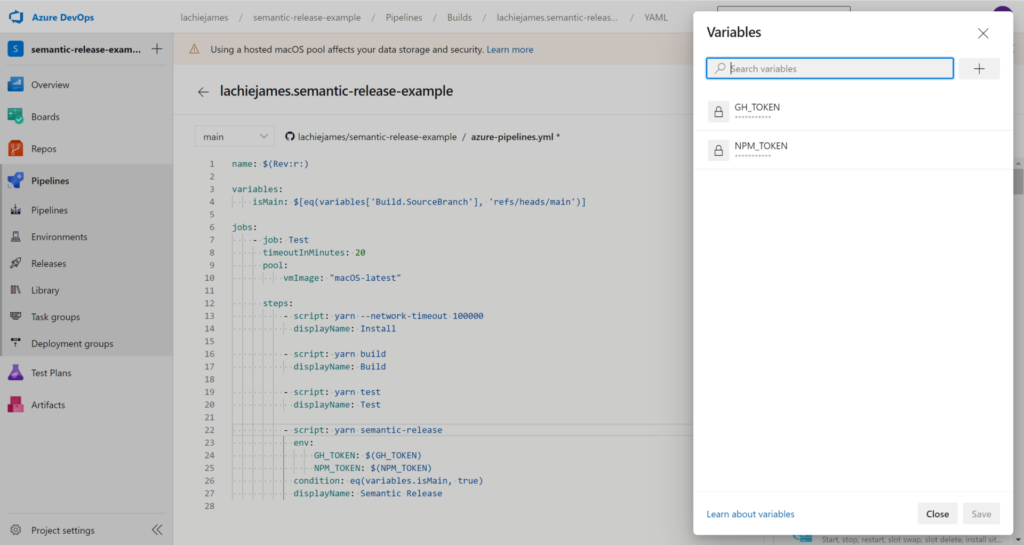
Append a semantic-release step to the end of your pipeline. Pass in the GH_TOKEN and NPM_TOKEN environment variables and start semantic-release by executing npm run semantic-release.
- script: npm run semantic-release
env:
GH_TOKEN: $(GH_TOKEN)
NPM_TOKEN: $(NPM_TOKEN)
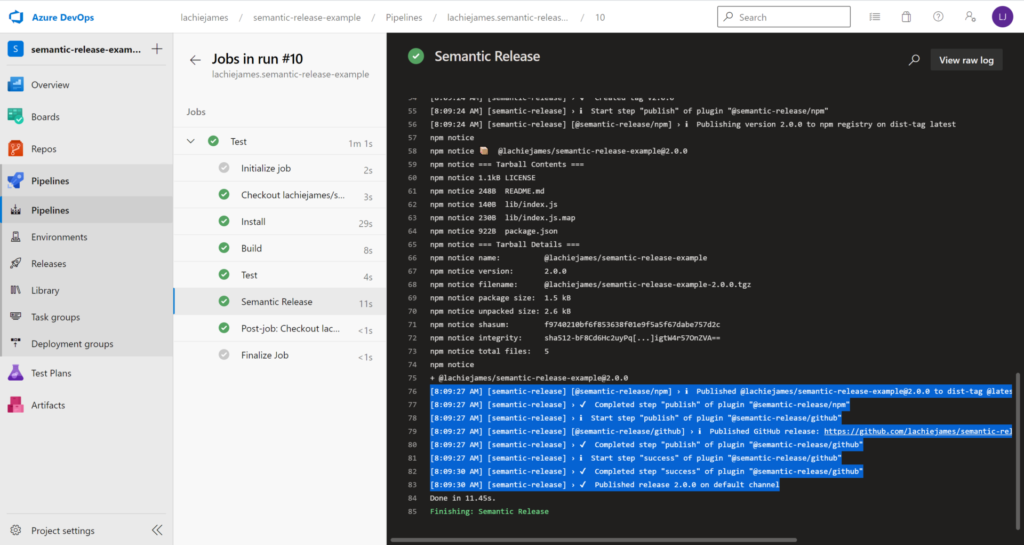
displayName: Semantic ReleaseIf semantic-release ran successfully, a message will be logged with the format Published release <new release version> on default channel.
Plugins
There are several plugins available to extend the functionality of semantic-release. Some plugins published under the @semantic-release scope include:
- @semantic-release/gitlab – Publish a GitLab release
- @semantic-release/github – Publish a GitHub release
- @semantic-release/exec – Execute custom shell commands
There are also a handful of plugins created by developers, such as semantic-release-vsce for publishing VS code extensions.
The code in this article can be found in my semantic-release-example repository on GitHub.